Selecting a Scanner in Raintree
1. In Raintree from the scanning menu select:
File -> Select Scanner
2. In the Scanner selection window select the scanner you wish to use
Note: If you see the same Printer twice you will usually want to select the printer with the "TW" prefix over the "WIA" prefix as it will allow you to scan multiple pages at once.
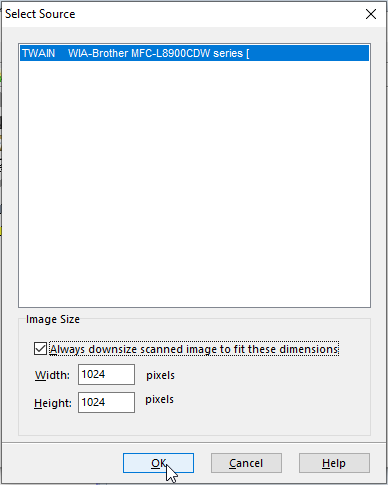
3. Check the checkbox for "Always downsize scanned image to fit these dimensions" and Keep the height and Width at their default values.
4. Click the Scan button in the top tool bar to Scan
Related Articles
How to Manually Update the Raintree Client
If you are having issues updating you Raintree client here is how you can do it manually! 1. Open Raintree and login 2. Right click on the top window bar of Raintree to open a drop down menu. 3. click on Update Raintree Client in the drop down menu ...How to Set the Default Printer in Raintree
By default Raintree's default printer is set to the Windows default printer however you may want to change this here is how you can! 1. Open Raintree, login and go to the main menu 2. Once you are at the main menu press [F7] this will open up a ...